Wednesday, February 23, 2022

I've fallen and can't get up!

Well, my pride denied the possibility of me dropping my bike, but it happened anyway. My bike fell over. Fortunately, the protection gear I added (Barkbusters and Crash Bars) did their job. But, despite all of the tips and techniques shown on YouTube, my 71 year old body could not lift the bike. 

Help, I've fallen and I can't get up!!!

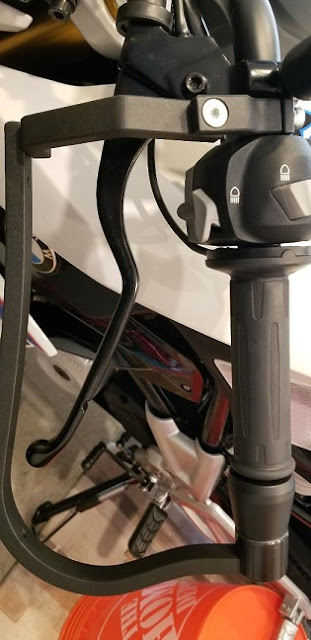
I dropped the bike when trying to place it on the center stand. Instead of holding the handlebars, I grabbed the crash bar. This allowed the front tire to turn and down she went.

My wife helped me and we struggled to get the bike up and on the stand. 

Since I often ride alone, I thought: "What would I do if I was alone somewhere with nobody to help?"

I researched solutions and found three: Motobike Jack, Dirt Napper and MotoWinch.


All three jacks looked like good solutions.  My favorite was the MotoWinch.  Alas, in this crazy supply shortage, neither the MotoWinch or Dirt Napper were in stock. I seriously considered the MotoBike Jack available from Ray Lyons direct or thru Amazon. But, I saw some shortcomings in all of the designs.  

First, they were all a bit "short" in that they probably would not lift my bike up completely---I would have to finish the job by pushing the bike up the final 15-30 degrees. Second, they all used a modified ratchet strap mechanism.

So, I decided to make my own.

First, I repurposed the ram extensions from a porta-power. This gave me 34 inches of length in the bar. I then fabricated another 18 inch length using 1/2" steel pipe, a 5/8" bolt and a heavy duty clevis yoke. This gave me 52 inches of length--enough to lift the bike fully upright. (The effective lifting distance is 43 inches, after accounting for the hoist or ratchet--almost enough to lift the G310R fully upright.)

The lift will essentially be at a 40-42 degree angle when the bike is upright, so if engaged at the lowest part of the seat, the 43 inch lift brings the bike fully upright.  In addition, the longer the bar, the less the lift leans as the bike is lifted--making it easier to keep the "foot" in place.

The main "disadvantage" of the commercial offerings is that they do not typically lift the bike fully upright. First, a column becomes much weaker as it gets longer, so limiting the maximum length saves weight and space. Second, a ratchet strap is severely limited as to distance of lift, depending on the thickness of the strap. Most straps will only allow about 20 inches of lift. In essence, the commercial offerings lift the bike to a point that requires the rider to lift the bike the final 30 degrees. This can still be a force required in excess of 100 pounds.  However, the rider is better positioned to apply such force using only leg muscles. But for a senior rider with bad knees or hips, that force could still be intimidating. And then, there is the possibility that the bike falls on a surface that is not horizontal, but downward sloping, which requires more lifting distance. 

A fabricated a ratchet strap winch to hook to the bar. (Took the ratchet apart so that it pulled down when rolling the strap.) But, my real desire was to use the 1/4 ton reversable chain hoist from Harbor Freight---this allowed me to raise or lower the bike.


The jack worked great, but my o my was it heavy. (14 pounds) Double the weight of the MotoBike Jack and nearly triple the weight of the Dirt Napper and MotoWinch.  (The chain hoist itself weighs nearly 5 pounds and the porta-power ram sections are probably three times as strong and heavy as needed.) So the next challenge was to figure a way to carry the jack on the bike safely. I chose to store the bars in a 3 inch PVC cylinder using Fernco Caps on both ends, with a nylon strap as a safety strap. I attached this to the rear crash bar I had fabricated and stored the hoist inside of the repurposed backpack I use for rear storage. 


I was a bit concerned about weight distribution with 14 pounds up high and in the back but handling was excellent--in fact the bike seemed to turn in better on corner entry and did not seem sluggish to come back up on exit. Another "benefit" of the extra weight was that the bike is perfectly balanced, front to rear on the center stand, making it really easy to service front or rear tires.

The project was fun and I am happy to now have a tool to get the bike up by myself.  But, when the MotoWinch is in stock, I may still consider carrying that on the bike to save 9 pounds. 


Friday, November 12, 2021

Gear to Protect the Rider

Watching the videos showing motorcycle crashes upped my due diligence regarding gear to protect the rider.

A helmet is an obvious requirement. But, what kind is the best.

The full faced helmet is certainly the best. This is what I wore when racing open wheeled formula race cars and I can personally testify to the importance of a full face shield having survived being hit by large chunk of metal from the race car ahead that struck me in the face at 80+ mph. A full faced helmet is even more critical when riding a bike without a large windshield. 

So the first decision is to choose either a traditional full face helmet, or a modular type with a hinged face and chin shield. 

More than 50% of head injuries related to motorcycle accidents are due to a frontal strike to the lower face. A modular type helmet may fail in such an accident.  So one must weigh this risk against the benefits of better comfort and communication allowed by a modular helmet. (One other deficiency of the modular helmets are that they allow more wind noise.)

Another choice is the material of the shell---thermoplastic ABS or more expensive fiberglass.


I am trying an inexpensive GMAX modular helmet but will probably end up with a Bell SRT traditional helmet. The GMAX MD04 is an adequate helmet, but does not have the extra tinted flip down sunglass feature that some modular helmets have. I do worry that in a collision that the hinge on a modular helmet could fail. The traditional full face helmet like the SRT can take a hit on the chin with more protection. Both helmets have excellent peripheral vision.

New technology like MIPS (Multi Directional Impact Protection System) or carbon fiber provide some additional protection, but a well made, properly fitted fiberglass Snell rated helmet like the SRT is a good solution. I would consider one in a bright color like the "Proverb" model below. (Although the Bell "advertising" is a bit of a deterrent.) 


Another choice would be an "Adventure" helmet like the Bell MX-9 shown above. This helmet has MIPS technology and is made from polycarbonate. It is not Snell rated but is EC 22.05 which is considered to be the EU equivalent or higher spec. I ultimately ordered this one because it provided the best visibility and strongest face shield. I also liked the peak visor for sun shade and the ability to wear goggles under the face shield. Finally, it came in a color and design that I felt was the most visible. The peak visor can create some drag at speeds above 65 mph, but I hardly ever ride at those speeds.


There are trade offs with helmet material. ABS is "adequate" and inexpensive but not superior. Polycarbonate is strong and resilient, stronger than ABS, but not as strong as fiberglass. Fiberglass is strong, but relatively rigid. So, if you hit your head on pavement, the MX-9 polycarbonate would be better as it would allow more deformation of the helmet and less shock force applied to the brain--especially with the MIPS. On the other hand, the fiberglass SRT would be better if your head struck a "sharp" object like a curb directly as the fiberglass would spread the impact to the head over a larger area. My take is that any direct hit where the added strength of the fiberglass would matter would probably be such a severe force applied to the brain or neck, that brain or spinal damage would result. (There are YouTube videos showing fiberglass helmets "surviving" a cement block drop, where a polycarbonate helmet is "deformed", but the head and brain inside the helmet, or the neck connected to the head would probably be severely and permanently damaged as the real protection of the helmet is mostly from the styrofoam liner.)

Race car drivers are likely to strike their head on a roll bar--fiberglass helmet better. (I have experienced this being knocked unconscious in a NASCAR crash where my head hit the roll bar.) On a bike, I think the most common impact would be on pavement---mild low side or serious high side crash impact---polycarbonate with MIPS better. 

The next decision is regarding armor and abrasion protection. The traditional "leather" suit is considered the gold standard for abrasion protection, but leather is hot and expensive. Upon some research, I concluded Cordura textile was adequate as long as armor was added. The Cordura would likely be destroyed in a 5 second slide (unlike leather that might survive for another day) but the armor would likely minimize damage to the rider. 

Motorcycle apparel armor is rated by European CE Standards as Level 1 or Level 2. Level 1 is rated to allow transmission of a max of 24 kN; Level 2 a max of 12 kN.

Upon some research I discovered the HWK line of outerwear, sold on Amazon. Adventure Jacket: Cordura 600D outer fabric, Level 1 armor in elbows, shoulders and back. Mine is white and black. Works great in cold weather with the addition of a neck scarf. 


Adventure Touring Pants to match with armor in hips/thighs and knees. I ordered the pants in one size larger. They fit over jeans, but also have an adjustable waist allowing them to fit without wearing jeans underneath. 


The HWK pants and jacket are rated "4 season" but I thought they might be too hot in the hottest summer weather. Plus, I thought additional armor under the jacket and pants might be prudent if riding at higher speeds.

The best "armored underwear" I found to be worn over a shirt and/or under a jacket was the BOHN product. Level 2 armor in elbows, shoulders and back. (Watching riders falling off in races, I noticed that most were sliding on their backs, so armor on the back is important.) 


Bohn undergarments for pants are also excellent, but I chose the ICON equivalent instead as the D30 Level 2 armor was supplemented with additional kevlar abrasion protection. These "Armored Compression Pants" are made to wear under jeans.


Finally, the boots. Good to go with leather above the ankle with heavy soles. I preferred to go without laces. So I chose a pull on "Wellington" style boot.


Finally, in colder weather, the "wind chill" temperature becomes a factor. The rider's body is generally well protected by good outerwear, but the hands and the head/neck are particularly vulnerable. Speed affects the equivalent temp.


Hands are protected by gloves, but auxiliary heat from heated grips or heated gloves is useful. My bike has heated grips. In addition, the Barkbusters hand guards shield the wind. (Without the heated grips, even with the Barkbusters hand guards, and heavy duty insulated gloves, I noticed that at 40 deg F, equivalent to 26 deg F at speed, my hands were cold.) 

The G310R is a "naked" adventure bike, but my bike has a Puig Sport Windshield. It shields a bit of the chest from wind, but not much for the head.

I added a Puig 6007 Windscreen Extension to provide additional shielding for the head area. The concept of this is not "traditional" in that there is no direct shield in front of the head provided by a "high" shield. Essentially, an "air curtain" is provided by the extension that provides a channel for air to flow directly upward, redirecting the air above the lower shield that would otherwise flow directly toward the rider.


I set up a very crude air flow measurement test using a leaf blower to direct air toward the windshield below the extension. It showed that the "equivalent" air flow is now redirected from 20 inches above the driver's seat (just below neck) to about 32 inches which should be just above the driver's head is leaning slightly forward.

The "real world" result seems to be that the extension substantially reduces the velocity, noise and turbulence at the helmet...but does not eliminate it.  Additionally, the windshield and extension are very narrow, so there is a lot of air flowing by the sides of the helmet, and magnified by air that is directed up along the sides of the fuel tank.

The extension worked well---made riding more pleasant--especially as it reduced the cold air flow directed to my neck and chin area.

Here is a pic of the Puig Sport Windshield and the Extension mounted on the bike.


Crash Protection

Other than YouTubers, nobody intenionally "drops" a bike. But, it is unrealistic to think that you will NEVER drop you bike or that it will NEVER fall over---no matter how careful and skilled you are.


So, adding crash protection seems prudent.

The best and most well known product to protect the hand control levers comes from Barkbusters a company in Australia. Essentially, a thick aluminum bar frame attaches to the handlebar and surrounds the control levers. There are universal mounts--I chose the one designed for the G310 available from T-Rex Racing. The added benefit is they protect your hand from tree branches if riding in the woods, or from other motorcycle handlebars, and/or car mirrors if splitting lanes or riding/driving close. 


The next addition was engine "crash bars" added to the frame to protect the engine and especially the fragile radiator. 


These bars are well engineered and attach to the bike's frame using existing engine mounting tabs and a custom made split block type frame bracket. Very stout.

There are several YouTube videos showing the effectiveness of the engine crash guards and hand guards protecting the front half of the bike. Protecting the rear half is more problematic as there is not real truly "robust" frame behind the monoshock. 

One vulnerable area, specifically the rear axle itself can be protected with simple crash "buttons" that attach using a long bolt thru the hollow axle. Again, T-Rex Racing provides good ones. (The picture also shows T-Rex Racing jack spools which I have not installed as the center stand causes the rear tire to be lifted.)


I was still not satisfied with protection of the rear of the bike---for two reasons. First to simply reduce the impact forces on the swing arm which the axle crash buttons do not do. And, without a rear crash bar, most likely you will damage your shifting lever or rear brake lever. Second, if the bike was dropped during cornering or in anticipation of a collision, I wanted a way to reduce the weight that would be in contact with the rider sandwiched between the road and the bike. 

On the right side, the muffler provides sufficient protection, but the left side has nothing.


My first thought was to make use of the passenger's footpeg. I fabricated a bracket to keep the peg from folding up. I made it weak enough (from soft 0.40" aluminum) to hopefully crush if encountering a force strong enough to break the aluminum die cast side bracket that the peg is mounted to. I also pressed on a rubber tube (hose) and vinyl button to "cushion" any impact and keep the relatively sharp peg from digging into pavement.


The best solution for rear protection seemed to be from something attached to the frame behind the seat. Watching an installation video on a Shad Top Case, it occured to me that a large (wide) top case (around 24" wide) would provide the protection I wanted. But, I really did not want the height of a top case which makes it harder to swing your leg over when mounting the bike. 


The Shad 39 in the video was 20" wide. The Shad 48 is 24" wide.


Both cases use the same mounting bracket on a G310R. I purchased the bracket and installed it as shown in the video. 

I analyzed the geometry of the bike and concluded that the 24" width provided by the Shad 48 was perfect to protect rider and bike. But again, a large top case was not my desired solution. All I need for storage is a back pack attached to the bike for carrying a bottle of water and rain gear or clothing.

So I designed a crash bar that would mount to the Shad mounting bracket. The 1/1/4" OD exhaust tubing "U" provided the almost perfect "crash surface".  Rounded and thin enough to deform in a violent crash, but strong enough to hold the bike up if dropped.  (From Summit Racing) I attached the tubes using two "beam"  structures fabricated from 3/4" square tubing and 1" u channel from Home Depot that together provided four contact points to the 1.050" ID of the tubing. So the tubes slid over the beams and the beams are attached to the Shad mounting bracket rear plate. 

I considered welding everything together, but decided that 8mm bolts would do fine. I did silver solder the exposed parts of the "beam" together. 

Here are pics---the first the Shad mounting bracket. You can see that the plate is mounted to a bracket supplied by Shad that bolts to the bike frame at the rear of the seat. In addition there are two solid steel arms that go forward and mount to the same location where the rear sear handles mount. Then, the crash bar with back pack for mock up. Finally, the painted parts in place reading to ride.


The rear crash guard can be used to tie down a back pack or duffle bag. It is very strong up/down and fore/aft. There is slight bending when a twisting torque is applied, but the movement is mostly in the bike frame itself--the Shad mounting bracket is as rigid as needed. As mentioned, the design assumes that some energy would be absorbed by deformation of the thin wall exhaust u tubes in a violent crash. 

The bars in combination should allow the bike to slide away from and not trap the rider if dropped when riding.


Wednesday, November 3, 2021

The First Mod

The BMW G310R comes with a side "kick" stand without a center stand.  Probably this is so to provide more ground clearance.

Since I was not intending to go off road on rough trails, ground clearance was not an issue, so I wanted a center stand. Center stands keep the bike upright (less likely to fall over).  The other benefit is that servicing the front or rear tires/suspension is easy as the center stand serves as a "teeter-totter" so lifting stands are less necessary.

T-Rex Racing makes an excellent kit to add a center stand to the G310R.


I installed this well engineered kit. It works well as expected.

I also made a safety stand (using 4x4 columns attached to plywood base) to use when the bike is parked in my garage. The safety stand slides under the swing arms. A low friction polyethylene sheet is placed under the front tire so the bike does not rotate when moving steering.


Getting Licensed

In Pennsylvania, a M Class endorsement on your regular driver's license is required.

First, I went to the DMV and took a written (online) test, and passed. When the young lady was about to my "learner's permit" she informed me that I had an "outstanding issue" with the State of Arizona, which I had to resolve before she could issue the permit.

I had not been in Arizona since the 1980's so I was convinced there was some mistake, but when I contacted the Arizona DMV, they informed me that I had a $20 outstanding fee from 1986.  (This stemmed from a speeding ticket in Arizona while living in Texas, where I paid the fine but did not go to court and somehow was charged a fee for "failure to appear" which then generated an AZ license that was then suspended. I could not even remember the incident, but my son reminded me that we had taken our Formula Ford to Phoenix for a SCCA Race in 1986.) I was shocked that this had never come up before since I had changed states twice since, but apparently computers are now reporting to and monitoring a national database that was "improved" in 2000. Here is a quote from the NHTSA--

"The National Driver Register (NDR) is a division in the National Center for Statistics and Analysis under the National Highway Traffic Safety Administration (NHTSA). The NDR maintains the computerized database known as the Problem Driver Pointer System (PDPS) which contains information on individuals whose privilege to operate a motor vehicle has been revoked, suspended, canceled or denied or who have been convicted of serious traffic-related offenses. The records maintained at the NDR consist of identification information including name, date of birth, gender, driver license number, and reporting State. Based on information received as a result of an NDR search, PDPS will "point" the State of Inquiry (SOI) to the State of Record (SOR), where an individual's driver status and history information is maintained."

Arizona would not take a credit card, only a cashiers check or money order via mail. So, after sending a $20.00 USPS Money Order, about a week later, I was able to get my PA Class M Learner's Permit. 

Once you have the Learner's Permit, you can ride alone during the day for a year. Within that time, you either attend a Rider Safety Training Class or you take a DMV Driving Test. I chose the Rider Safety Training Class.

https://www.learntoridepa.com/

The Total Control Beginners Riding Clinic was a four day event attended by 11 riders. They provide the bikes. I was given a Suzuki 250. Great training. They stamped my permit and sent forms to PA to have my driver's license given the M Class endorsement.  PA pays for the training! 

We had two days of class room training including a comprehensive written test. Also, two days of riding 15-20 mph in a parking lot followed by a riding test. Essentially showing competence hat weaving thru cones, stopping and swerving safely, etc. 

I actually learned quite a bit and as a "rusty" rider, my confidence and riding skill was improved. Countersteering or "push left, lean left, turn left" as a concept was a new concept.

Most of the riders in the class were younger than my children and several were the age of my grandchildren. 

Sunday, October 31, 2021

Background and History

I am a man with many varied interests, but one of the most important is a fascination with mechanical devices and machines of all kinds. 

As I recall, the first important machine in my life was the bicycle. I had several and had a habit of traveling long distances. Before I was old enough for a drivers license, I purchased a mo-ped---a hybrid bicycle and motorcycle with a 50cc gasoline engine. I got it cheap since it did not run, and I took it apart, fixed it and rode to work where I was a short order cook in a fast food restaurant about 4 miles from home. That did not last long as a police officer stopped me and informed me that I could not ride the mo-ped without a drivers license.

At 16, with a driver's licensed on the day of my birthday, my father helped me buy a new 1967 Ford Mustang. Not long after, he bought a Suzuki 250cc motorcycle, that I sort of took over as my own. I rode the motorcycle all over western PA venturing out on long 200 mile a day trips.  (Photo of similar bike)


On my own, married at 18, supporting my family took most of my resources. But at age 30 I was prosperous enough to earn my pilot's license and to buy an airplane. Then a motorboat. When my son showed interest in motorcycles, I bought him a small motocross racing bike along with a 250cc Yamaha racing bike for myself and we raced at tracks around Dallas, TX.  (Photo of similar bike)


My career up to then had been as a corporate executive and engineer responsible for fleet maintenance. Director of Maintenance for a trucking company, Then, Vice President of a company running 5000 school buses, and later with Trailways with 2000 buses. Lots of machines to take care of.

Tired of corporate politics, I bought a small car repair garage. No money for airplane and boat, so they were sold. The business grew and prospered and after a few years I started racing automobiles. SCCA amateur (FF1600) and pro events (FF2000 and Trans AM). With some partners, I started an engine parts aftermarket company. With the profits I started a NASCAR team and drove in a few events. A serious crash ended the professional racing.


Ten years later, I took up sailing and bought a 30 foot sailboat, then a 38 foot motoryacht. A new entrepreneurial enterprise required all my capital, so the boat was sold.

Once the new business began to show success, I renewed my interest in auto racing. Formula Vee in SCCA, and then Legend Cars on dirt ovals for fun. Now in my 60's. I found auto racing to be too strenuous. 


So, I renewed my interest in airplanes, refreshed my qualifications and bought a small plane.  Lots of fun, but I was uncomfortable with the massive amount of air traffic
  and flight restrictions in the eastern US. 


Sold the plane and bought a slow 36 foot Grand Banks Trawler but found that working in the cramped engine room was too difficult---now at age 70, arthritis was becoming a factor. Sold the boat.

Life is bit of a full cycle.  Back to bicycles and motorcycles. (35 years later!) Some of my friends were riding big heavy cruiser bikes--traveling all over the country--70+ mph on the interstates.  That type of riding was not for me--too dangerous. The motorcycles are not dangerous---the truck traffic and congestion is the source of danger. My son and grandson ride motocross, but wrestling a bike on a dirt track is no longer in the cards for me. So, the type of bike I was looking for was what I would call a "naked adventure" bike. The actual model would depend on how much, if any, off road trail riding I intended to do, and of course how much horsepower I wanted.


The quintessential adventure bike is arguably the Honda Africa Twin shown above. 90+ HP 1100cc weighing in at 550 pounds with a 34" seat height. This bike will take you anywhere-even around the world. A really fine machine.

With a 32 inch inseam, a 34" seat height does not allow both feet on the ground, plus 90 HP was way too much bike for me. And, I was just going to ride around rural Central Pennsylvania.

I considered more of a touring style with a vintage R1200C BMW, made famous in a 1999 James Bond movie. See below.


Beautiful bike, with lower seat height. 1200cc, but only 60 HP. I decided that 500+ pounds of bike was too much for me.

The other extreme would be to go to a "Dual Sport" bike, like the Suzuki DR200. See below.


I would change tires to a combo street/offroad tread, less knobby.  Seat height of 32 inches, and weighing only 250 pounds, it would be adequate for the 35-50 mph speeds on most of the roads I intended to ride on. In the end, I decided, with only 20 HP, it was not enough power and not enough acceleration for safe highway driving with a 200 pound rider.

So I set my sights on two bikes.

The Yamaha MT03 and the BMW G310R. 


The Yamaha had a twin cylinder engine. The BMW had a single cylinder engine. Otherwise, the two are quite comparable. (Yamaha is a bit faster.)

I chose the BMW, well...because it is a BMW---even though it is made in India. I have a respect for German engineering and design. See below


The BMW has 34 HP, 310cc and weighs about 350 pounds. Seat height is 31 inches. I can put both feet on the ground and can "walk" the bike without too much effort. Light enough for me to hold up and even pick up if it falls. Accelerates 0-60 mph in 7.3 seconds and top speed is 90 mph. Fast enough for me. Here is a video. (Speedo showing Kilometers 100kph = 60 mph;  7.3 seconds 0-60 mph, 6 seconds 60-75 mph)


I've fallen and can't get up!

Well, my pride denied the possibility of me dropping my bike, but it happened anyway. My bike fell over. Fortunately, the protection gear I ...